Time to decorate the fireplace for Valentine’s Day!
It can look so much nicer to hang something large and Valentine themed over (and under) a mantel full of decorations because it enlarges the look of your festive display. But, one problem is that Valentine themed art is very hard to find and can be expensive so why not create your own?
Step 1 – search your local thrift store for a wooden frame.
A wooden frame can be any color because it’s easy to paint. I found this one last year (it was a dirty, dusty brown color) and painted it white to create a shabby chic look to use in some Spring themed decor.
For Valentine’s Day, I added a red, beaded garland (using spots of hot glue, here & there to secure it) to the frame temporarily and displayed a lightweight wreath of roses from a bow and ribbon in the center of the open frame. Viola!
HELPFUL HINT:I hung the frame on an existing nail, but you could also attach the bow to the top of the frame and lean it against the wall.
Step 2 – “new-purpose” old decorations!
A common thread you will notice in my style of decorating is that I re-use (or “new-purpose”) decorations I already own and many times, for a different holiday! Do you remember the faux fern I used to border the snow under my Fairy themed Christmas tree a couple of years ago? Check out how nice it looks along the back of the mantel with last year’s Dollar Store roses and a $1.00/pkg. of pink, glittered hearts (Dollar Tree) tucked in. It serves as a beautiful backdrop to my sweet Cupid, 2 heart-shaped topiaries and faux rose petals on the mantel.
And just in case you were wondering how roses might look on a tree, for Christmas, check out the rose-themed tree I designed for a client.
Also, if you have a large Valentine sign (like this “BE MINE” from Home Goods), you can use it to decorate the front of a mantel, by removing the hanger and using “Tack-it” (temporary gummy adhesive) to secure it in place for the holiday. I just love how these 2 additions simply & inexpensively enlarged my Valentine’s Day mantel design.
Step 3 – Don’t forget the details! I’ve had my sweet, little Angel for a long time, but this year (for the first time) I happened to notice that she had a tiny bird on her shoulder. Keeping in mind that LOVE comes in all shapes & sizes, I used my hot glue gun to add a small heart to his beak because… of course, he would bring her a little Valentine’s Day greeting!
And if you like the little glass votive candle holder I placed in front of my Cherub, it was super easy to create! The glass votive is a plain one I purchased at the dollar store and added the word “LOVE” to, using my favorite self-adhesive vinyl letters (see office supply stores for these, in all fonts & sizes). You could also use a stencil and paint or etching cream to add a heartfelt sentiment. The candle was even a bargain because I purchased it after Christmas for pennies!
Once I removed the ribbon, “Merry Christmas” sign and the tabletop decorations, I noticed how beautiful and wintry the greenery looked, so I just added some glittered red hearts (wall hangings cut-apart from the dollar section of Target), red velvet heart picks from The Dollar Store and my “smooch” stickers (purchased a few years ago).
Total cost to take it from Christmas to Valentine’s Day: $3.00
I replaced the hanging ornaments (on the curtain rod) with a simple valance I sewed, using $3.00 worth of fabric from Wal-mart and added a $3.00 felt heart garland from Target to trim it out.
The tree ornaments are 3-piece, glittered Valentine wall hangings (from the dollar section of Target) that I cut apart and used alongside cardboard hearts (removed from a $4.00 Walgreen’s wreath). I added one new thing that softened the look of the white tree and made a wonderful garland – inexpensive light pink feather boas! For the base, I made a pink cupcake liner (from poster board) to replace the blue (Christmas) one and exchanged the glittered ornaments, tucked in the pink frosting (spray painted polyester batting) with sprinkles, which I made from leftover poster board and paper. The Christmas tree was bright and happy, whereas the Valentine’s Day tree is soft and sweet!
I’ll be hosting a Valentine themed meeting next month, so I test-drove the table cover, dishes and chair decorations to see how they’ll look too. I’m loving this lush, pink color! And by the way, the chair decorations are nothing more than another glittered “Conversation Heart” wall hanging I also found in the dollar section at Target and tied on the back of the chair with an inexpensive piece of ribbon.
It was fun to fill my cabinets with Valentine goodies too and I re-purposed some Christmas decorations there… can you spot them?
I covered the star (on the top) with a couple of the cardboard hearts and of course, placing it next to a couple of Valentine cupcakes creates an instant Valentine’s Day treat!
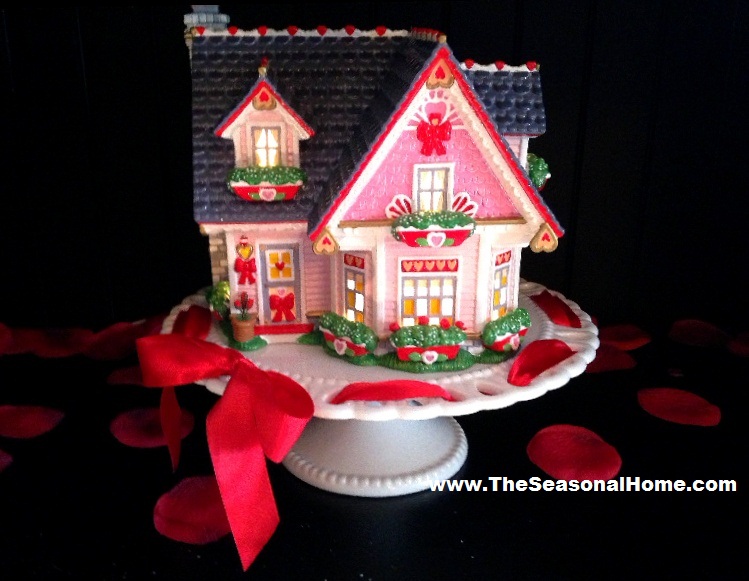
Remember this cake plate with a red bow, from Christmas?
It’s just as cute under a Department 56 Valentine house!
I use my apothecary jars year round, including Christmas. I changed the candy, in several of them to Conversation Hearts (for Valentine’s Day) but kept the pastel jelly beans in one because the colors were perfect!
Here’s an idea you might want to try – use apothecary jars as frames by adding a few Conversation Hearts and tucking your photos or vintage Valentine Cards inside. You could display photos of you and your sweetie or your kids/grandkids. It’s just a different way to display photos or other keepsakes without purchasing a separate & costly Valentine’s Day frame. And hey… it makes a real conversation piece too!
Stay tuned for a Shabby Chic idea for Valentine’s Day (blog post) next, coming up in a couple of days!
While cruising the offerings at some of my favorite local stores (The Stable in Lake Alfred, FL & The Pottery Barn), it’s hard not to notice how adding natural textures, like rope or twine, to a (large or small) candle holder creates an instant summer look. So, check out the great products I found OR dig out your glue gun to re-purpose a candle holder, you already have, by adding some instant texture… what a great (inexpensive) way to gift yourself or someone else this summer!
And while we’re on the subject of using natural textures to create something special, check out how pairing a little burlap and twine makes a great gift wrap for a bottle of wine… the perfect summer hostess gift!
This is the first Fall season I’ve had a goat cart to decorate. It’s so much larger than my wagon (now holding herbs in the back yard), so I was challenged to fill it on a budget, which of course, is The Seasonal Home’s motto!
New purchases included 2 new scarecrows (the Florida sun is brutal on these, so 1 year is all you get! lol) and a fresh bale of hay, spending around $15, using 40% off coupons. I already had a fall leaf garland and some pumpkins, but as you can see in this first (test) photo, my pumpkins had faded more to the color of oranges in comparison to the one brand new one, shown in the back of the cart. I know I live in Florida, but it’s Fall and pumpkins are what’s in season. 😦
The thought of purchasing all new pumpkins (even real ones!) made me cringe over the cost. But luckily, I found a new, no-prep super bond spray paint product (FUSION by Krylon) that doesn’t require sanding or priming, bonds to plastic and dries in 15 minutes AND it comes in a Pumpkin Orange color…..100% yay! So, for the price of 1 can of paint ($4), I renewed all of my faux pumpkins. HINT: Don’t spray the pumpkin too heavily. In nature, pumpkins have different shades in the surface of their skin, so a light spray coat looks more natural.
The other idea I had for my fall yard vignette was a “HAY RIDE” sign, but do you think I could find one? Nope! I’m not a true crafter either, so making one myself (from scratch) wasn’t a good option. But, I didn’t give up and found a Halloween theme sign (see the spooky eyes) that was blank in the center. It was only $6.99 and I got it for 40% off at Hobby Lobby. I used a stencil, with a cool font, and some black stencil paint to slightly change the sign to have it read “HAY RIDE 25 cents”.
Below is the finished product…. my front yard Fall vignette.
The Seasonal Home is decked out in it’s Halloween best and this year, it’s a little S-P-O-O-K-Y!
In my previous post, I showed you an inexpensive fireplace idea. I was inspired by the Crow (on the mantel), so I spread a few more around the room, beginning with my french doors. I found a generous package of 15 die-cut paper Crows at The Dollar Tree and with a little double-sided tape, I used them to create the old design trick of bringing the outside in.
This would also be a fun idea to use in front door sidelights or window.
And below, in The Seasonal Home’s built-in cabinet, I purchased a few Dollar Tree crows and dressed them up, for Halloween, in little witches hats…
If this look is too plain for you, consider what I tried next… also from the Dollar Tree! Inspired by this idea (I found on the net), I decided to add a background to THE SEASONAL HOME’s built-in cabinet. Using newspaper to create a pattern , I drew a tree and used it as a pattern to create a spooky tree on 2 pieces of black poster board.
Here’s how this look turned out –
The foyer in THE SEASONAL HOME has been transformed into a Magic Potion and Spell conjuring laboratory….
And in the Living Room… some Fall and just a bit ‘o spooky –
THE SEASONAL HOME’s kitchen is ready for guests….
and the best part is…. I created a CANDY BAR this year! I thought this would be a fun treat for the adult guests, I’m entertaining this season, to once again enjoy a little (retro) Trick or Treating fun. I looked for the most inexpensive candies I could find (avoid a lot of chocolate to stay on budget) and used every jar I could find in my house and anyone elses (lol). I purchased one (1) package of “blank” Halloween labels at Michaels Craft Store for under $4 (with coupon), and using my computer – typed my label wording in a spooky font, lined things up and ran a test print. When I held the label up behind the piece of printer paper, I saw that my estimated font size was good & lined up perfectly, so I taped the label to the corner of my paper (using double-sided tape) and ran them through the printer, one at a time. Once I finished printing them all, I grabbed some twine from the garage, punched 2 holes in the top of each label, fed the twine through and knotted one end. Next, I pulled it tight around the neck of each jar, fed it through the 2nd hole, knotted it, cut off any excess and in no time, my jars were labeled for very little cost. Check out the finished product and help yourself! 🙂
Enjoy the Creativity!
Eileen
Grab a goodie bag to fill!
Who’s that standing in line for his share of the candy? Eeek!!!
[As always, click on any photo for a larger view…. enjoy!]
It’s so much fun when a Halloween theme comes together… inexpensively! Normally, I decorate The Seasonal Home’s fireplace and mantle with a “cute spook” or “fall” theme. But, check out how I decorated my fireplace this year. It was mostly inspired by Dollar Tree finds as well as 4 sets of black, glittered and lit branches I found on the www.terrysvillage.com website, at a bargain basement price, which gave The Seasonal Home a slightly haunted look.
Originally, these branches were meant to line a front walkway, but as always, I saw a different use for them…. in planters, to flank each side of my fireplace hearth. So, I began the hunt for 2 planters to hold my bargain branches. My first stop was Wal-Mart where I found 2 beautiful and large, footed, gray stone planters on clearance for $35 each. Definitely a good price and I could justify the purchase by recycling them as outdoor planters afterwards. But, I didn’t really “need” planters and I spent so little on the branches that it seemed silly to spend more on the planters, so I kept looking. I ended up at Big Lots and found these $3 bargains in white and grabbed some gray spray paint also, for $2. Once they were painted and dry, I filled the planters, half-way with (recycled packing materials) styrofoam. On top of that, I poured about 5 cups of inexpensive sand (for stability & weight). Now, they were ready to hold my glittered branches! To finish the look, I placed moss on top of the sand, which also hid the base of the branches. A few faux eyeballs and that part of my theme design was complete! [Consider using this idea at Christmas, i.e. snowy-white branches in a silver planter, etc.]
My Dollar Tree finds included a spider web, spooky rat, 1 pkg. of black Creepy Cloth, a few skulls and headstones.
I also added in a couple of decorations I already had: a fall leaf garland and wreath and used my existing candlesticks to display the skulls. I painted a pumpkin to coordinate with the color scheme and added in a few candles and a crow I found at Old Time Pottery for under $5 each. So, for very little expense, I created a “not-too-creepy” theme… I hope it inspires you too!
Personally, I think today’s tough economy has given rise to this new trend I stumbled upon.
Let’s face it, families are struggling and therefore, stores are struggling, so people are looking for easy and inexpensive escapes into fantasy-filled things like movies, video games, etc.; basically, anything that creates an imaginary world away from their troubles. My guess is that a very creative and smart store owner, in a small town somewhere, may have come up with this small touch of fantasy, to lighten the mood of their store guests. What a great idea…. to begin a shopper’s experience, by creating a whimsical mood, right outside their store’s front entrance!
Just imagine yourself approaching a storefront and noticing a tiny, little door, somewhere on a wall, near the store’s entrance. You know this miniature, out-of-place oddity would catch your attention! Immediately, your mind begins to wander to a happy, trouble-free place. Although the thought only lasts for a brief moment, you imagine a tiny fairy sneaking in the store, while no one’s looking, via her very own private entrance. Automatically, a smile that begins in your mind, ends up on your face and viola’, the proper mood is set (by the store owner). You’re in the right frame of mind to shop because now, you think of this particular store as a magical place full of creativity and whimsy, ready for you to explore and find a tiny, inexpensive treasure (of your own) to take home and enjoy. Here’s a photo I found (on the internet) of a store owner who did just that:
And now that you have seen how adorable this creative idea is, allow me to inspire you to create one of your own, by showing you how inexpensive and easy it is!
The first and main thing you will need is an unfinished doll house door. They are inexpensive (around $10) and available in many places, i.e. craft stores, miniature shops and on the internet on websites like http://www.ebay.com. I am suggesting that you purchase an unfinished door so you can paint it any color you want. In my case, I went with green to coordinate with my own front door, like any southern fairy would! (LOL) In actuality, I painted mine green because I plan to redecorate it for each season and green goes with everything. Also, if you want to keep your expenses low and also make things easy on yourself, purchase a door without a window as this will avoid the need for curtains.
Because I was decorating my fairy door for Halloween, I simply used a piece of orange tissue paper ( with a spider & spider web design, recycled from a gift I received) as a curtain. I taped it to the back side of the door and I was done… so easy! I also glued one-half of a clothing snap (from my sewing kit – $0) to the left of the door, to simulate a doorbell. Then, I found a door handle and key at a craft store (Hobby Lobby) for apx. $3. I glued the door handle on the door and laid the key on the front porch.
If your door doesn’t come with a front porch (stoop), it’s very easy to create one. Mine didn’t come with one, so I purchased a very inexpensive strip of balsa wood (less than $2), cut it to fit, glued it to the underneath side of the bottom of my door and painted it. Creating a front porch is important because that is where things (your fairy collects) are displayed to stimulate your guest’s imaginations.
On the front porch, I placed:
miniature pumpkins (cut from a single fall, floral stem, purchased at a craft store for .99 cents)
a miniature hay bale, cut into 2 pieces and stacked (.99 cents)
a tiny witch’s broom made from a q-tip, which was painted and a little straw (from the hay bale) was added around the tip to create the broom bristles (free)
an acorn (free)
a penny (.01 cent)
a little bird seed (free)
a tiny Jack-o-Lantern Pumpkin to simulate a Trick-or-Treat container. Inside – a few pieces of tiny bird seed painted orange, yellow & white (to simulate candy corn gathered on a night of Trick-or-Treating – .99 cents)
a miniature Fall wreath, made from one piece of my orange pepperberry garland (see the chandelier garland in my “HALLOWEEN 2010” post). I used the (removable) gummy “Tack-It” product (found in the office supply depts. of discount stores) to hang it on the door
the lit, nighttime look was created by a battery-operated strand of 10 LED rice lights (tiny little, low wattage lights found in any craft store). I hid the power box underneath the porch and tucked the rice lights behind the door’s window curtain to illuminate it at night (apx. $3)
NOTE: I hung my door on my brick (housefront) with a BRICK CLIP, easily found in the hardware depts. of stores
DAYTIME View
NIGHTIME View
This project took me a couple of hours to create and the process was very simple. The most important fact is that I thoroughly enjoyed the escape into creativity that this project provided for me. And for around $20, I will enjoy treating my family and friends (as the store owner above did) to some imaginary fun. I can’t wait to stir their imaginations, on Hallow’s Eve and throughout every season and holiday. I’ll be adding more photos to this posting, as each season approaches and my door designs are complete, but for now, here’s the finished product for Fall/Halloween:
Here’s my fairy door for the Christmas holiday:
These doors are the cutest when you place them near the floor. However, I have a very curious young child that lives next door to me and would love to rearrange this for me if he could reach it, so I simply placed it higher (LOL).
I was inspired to add this post to my blog by one of the wonderful participants on my Facebook Community Page (THE SEASONAL HOME). Like me, she is finding ways to create seasonal magic with the help of some old fashioned Apothecary Jars.
It used to be true that the only place you could find these vintage jars was in an antique shop, left over from a time when 5 & 10 cent store owners and compounding pharmacists utilized these versatile gems. Later, homemakers put them to good use in the pantry for staples like flour, sugar, etc. However, with their recent increase in popularity, home decor manufacturers have jumped on board and created replicas (of all types), which are showing up in stores, making them very easy to find.
What’s so great about these nostalgic jars is that they come in all sizes, colors, heights & widths and are typically, very reasonable (around $10+/-). So basically, whatever your space and decor needs are, there’s a jar out there to match it! I have about 7 or 8 different sizes and shapes and I use them to help me decorate for the seasons and for utilitarian purposes too. Below are a few photos of my jars in use. I hope they inspire you to try them out!
CLICK on any PHOTO
to view more detail
Fall Gourds
Display in Multiples!
Christmas Houses
Display a holiday ornament
Candy Container (creating an old-fashioned store-type of display)
Display a holiday house
Use your jar as part of a seasonal arrangement, on a shelf or table. This arrangement really brightens the bottom shelf of this foyer table.
CLOSE-UP VIEW
Contain bath samples in your guest bath
Theme your jar contents to highlight a memorable photo
And for even more creative ideas, check out the ABOUT THE AUTHOR page!
As you’ve seen in my book CREATIVE FAMILY TRADITIONS AND IDEAS, I am a HUGE fan and proponent of making memories, especially if you can make family members feel “special” in the process. And since there are only 4 months (from today) until Christmas, here’s an idea (I came up with) that brings my philosophy to life. I thought sharing it with you now would give you plenty of time to gather the photos, you will need, to display.
In late October, when Christmas decorations begin to appear in the discount (mart) stores, keep an eye out for “frame” style ornaments or gift tags (like the ones in the photo on right). Typically, they only cost around $1.00 each. If you can’t find any, purchase simple silver frames (always in stock at the Dollar Tree). Whichever you choose, purchase enough (of the frames or frame-ornaments) to display a photo of each of your children (even the 4-legged ones… LOL) and maybe yourself and your significant other. Then, add them to a wreath or a Christmas tree to personalize your holiday decor. Below are 2 example wreaths that I made… one in a snowy theme and one that’s a very whimsical theme (I donated this wreath, so there are no photos in the frames). Click on the photos for a closer look. You can also use this idea on a garland, as I did in my book, mixing them in with some other very special commemorative family ornaments to create the same look I did.
My favorite time I used this idea, however, was to make some members of my extended family (the adult nieces and nephews), as well as my own adult children, feel special. I chose to use silver frames and hung them on a 4-foot, flat-backed, wall tree. With the help of my siblings (their parents), I gathered photos, of each of my nieces and nephews as well as my children, taken when they were very young, at Christmastime. I placed one photo inside each of the frames and hung them on the tree, using pieces of red, satin ribbon, tied into a bow after slipping it underneath the frame stand to create a pretty ornament hanger. That Christmas, I was the family hostess and didn’t say a word to any of my children, nieces or nephews about the “special” memory tree I had created. It was so sweet when the first one of them realized their photo was on the tree. Immediately, there was a rush to the tree, with everyone looking for their framed photo memory. They LOVED my tribute to them and I sent each of the frames home with, their respective owner (as a holiday party favor), from me to them. The memory of their excitement gives me warm fuzzies every time I think about it. That is exactly why making memories will always be the most important thing I do in my life. I’ve shared more of these type of ideas in my book. Please check it out for yourself or when you need a special & original gift.
CLICK on PHOTO for a closer view of my wreath's details
CLICK on PHOTO for a closer view of my wreath's details
If you are enjoying my blog and creative ideas, please check out my brand new, Christmas Decorating DVD, available 11/15. Check out the right-hand column of this blog for details and thank you, in advance, for your support! :- )
It’s a fact that “Summer” is the longest (holiday) season of all. So….. why not place a few inexpensive summer accents around the room you inhabit the most (at this time of year)?
In my case, it’s the kitchen & dining room area, where I’m constantly whipping up pitchers of cool summer beverages and tasty snacks to feed the troops. To me, Lemons bring back such a nostalgic feeling and memories of my first lemonade stand, so I decided to surround myself with this theme to keep a hot summer light & fresh. Also consider other citrus fruits… like oranges or pineapples!
[If you like this black & white look, but haven’t found any curtains or valances like mine, there’s a good reason. I wanted to “freshen up” my black & white toile accents for summer so I looked for a valance that had a more young & contemporary pattern… perfect for summer! Of course, you can never find what you’re looking for if you look in the NORMAL spots, so I started checking ALL the (Home Dept.) clearance sections of every store I went in to. Finally… EUREKA! I found some clearanced (teen) sheets in K-Mart. This set was an off brand and was marked down to $10! I only needed the top flat sheet to make 2 valances (1 not shown) for my kitchen area. I sewed them, using my basic straight sewing skills and a little black ribbon trim. However, you could use self-stick sewing tape and create this adorable valance with no sewing machine at all. Total investment: $15 for two (2) cute & contemporary valances… yea! I hope you find a cute pattern too. :-)]
[click on any of the photos below to view a larger image]
Real and faux Lemons and Limes encircle a vase of fresh yellow, white and green summer flowers. Placing your vase (and fruit) on top of a cake plate adds another level of interest to your arrangement!
Keep your counter or tabletop accessories simple so your lemon and or lime accents really POP!
Don't forget side areas in the room! Just look at how this small lemon wreath alongside a few (faux) lemon and lime accents adds that Summer-y touch to this Key West print.
Simply adding a small wreath of lemons around an everyday shelf accent extends my Summery theme into this cabinet display.
Keep accent furniture (around the room) in mind as you complete a summer theme in your home. Here, I tucked in a "lime" green pillow (see black bench) for the perfect final touch!
For more ideas, check out the ABOUT THE AUTHOR page!
Welcome to… the ART of decorating around the JOY of celebrating!™
Also… I’d love to hear from you!
Feel free to email me with any question, comment, suggestion you may have or with your request to have one of your ideas spotlighted - info@creativefamilytraditions.com
If you show off our creativity, please let them know you found it @ www.TheSeasonalHome.com -
so they can visit us to enjoy even MORE of our creativity! :-)
Click here to watch my FREE VIDEOS and enjoy some musical, holiday spirit: